This section describes typical editor's tasks. Full list of operations which may be performed on specific objects can be found in Appendix J, List of operations concerning objects of the dLibra system.
To create a new directory:
On the elements list select destination directory (parent directory of new directory) .
From the popup menu select . Alternatively, the toolbar button
 or
main menu option can be used.
or
main menu option can be used.In the first step of the New Directory Wizard enter name and description for the new directory. Press Next button to proceed to the next step.
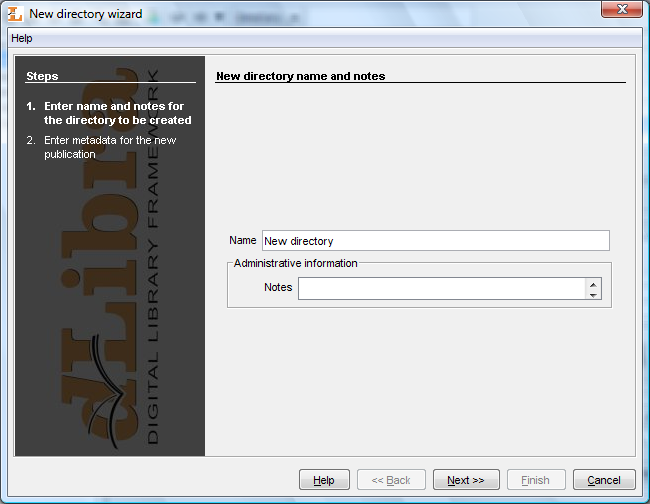
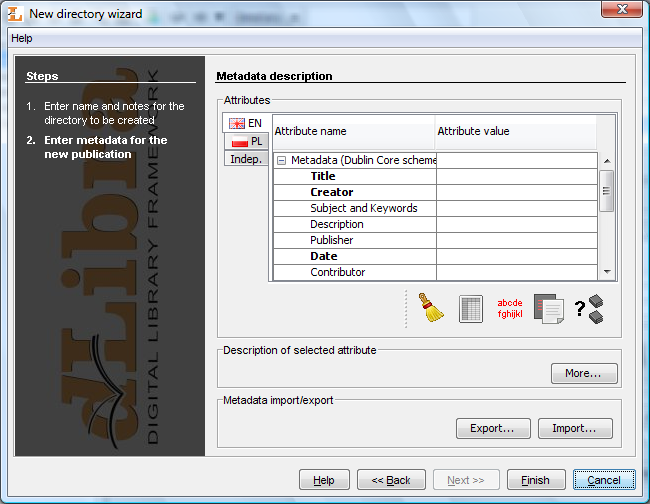
The second step allows editor to provide the metadata for new directory ( Figure 3.13, “New directory wizard - metadata”). Directory metadata state default bibliographic description of any new element created in it - this description is automatically added to appropriate step in new element wizard and can be modified there. The metadata editor is described in details here.
To create a new group publication:
On the elements list select the directory or group publication the new group publication should belong to.
From the popup menu select the New publication... function. Alternatively, the toolbar
 or
main menu option can be used. New
group publication wizard will start.
or
main menu option can be used. New
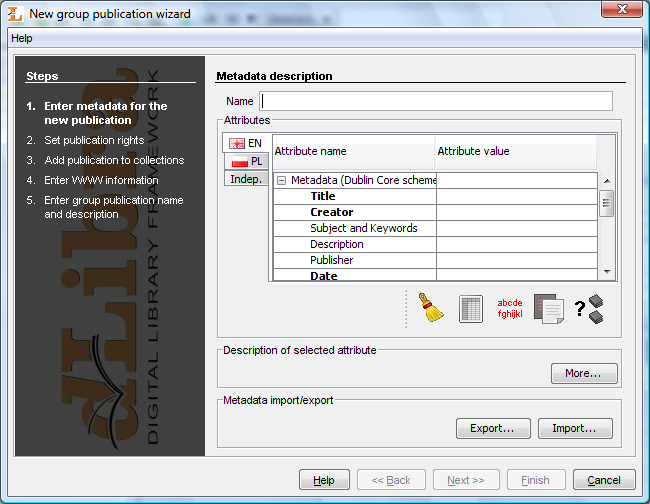
group publication wizard will start.In the first step ( Figure 3.14, “New group publication wizard - metadata”) provide metadata for the publication. See bibliographic description editor section for details. Provided metadata are inherited by all publications created inside this newly created group publication. In order to proceed to the next step publication name has to be given (Name field). By default the name is created basis on metadata by combining the title, author and publishing date (see configuration to change default settings). For example, if the title is “Stories”, author is “John Smith” and the publishing date is “2004” then the name will be “John Smith, 2004, Stories” - first author, then publishing date and title. Whenever user changes the metadata the name is updated. It is also possible to enter different name or modify default name. Press the button to move to the next step.
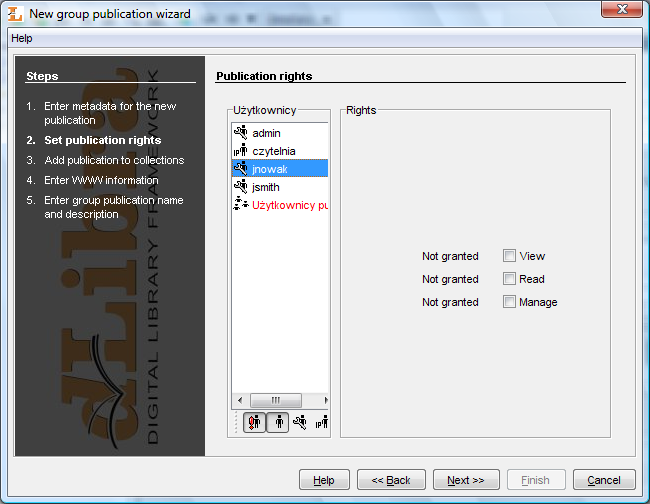
In the second step ( Figure 3.15, “New group publication wizard - rights”) specify users rights to publication. See rights editor section for details. Rights are inherited by all publications created inside this newly created group publication. Press the button to move to the next step.
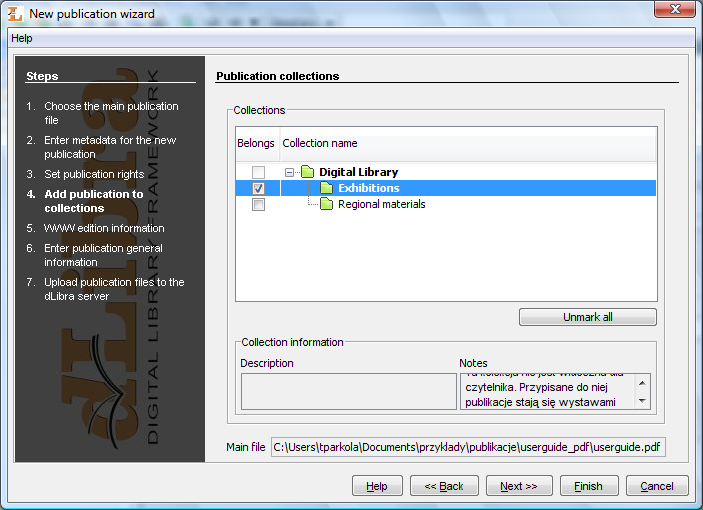
In this step ( Figure 3.16, “New group publication wizard - collections”) specify collections assigned to publication. See collections assignment editor section for details. Collections are inherited by all publications created inside this newly created group publication. Press the button to move to the next step.
In this step ( Figure 3.17, “New group publication wizard - WWW information”) specify WWW information: Description which is presented on search results list, Comment and Miniature available on publication information page. Press the button to move to the next step.
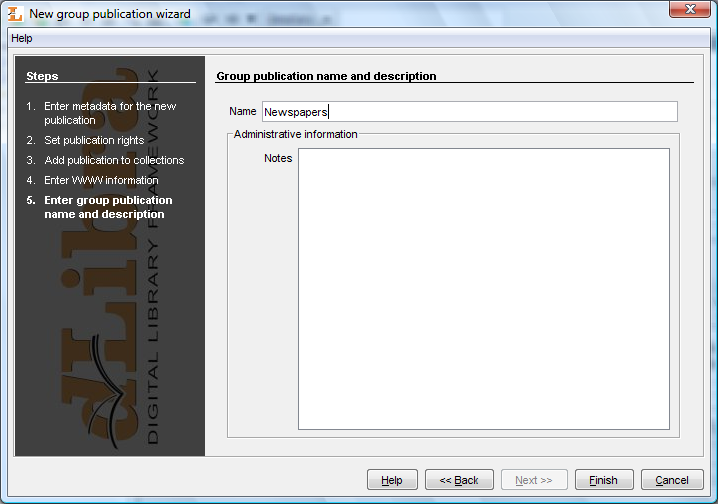
In the last step ( Figure 3.18, “New group publication wizard - general information”) verify name and enter notes if necessarry. Click to create new group publication.


![[Note]](gfx/admonitions/note.gif) | Note |
|---|---|
All the publication files have to be placed on a local drive before creating publication in the dLibra system. | |
To create a new publication:
On the elements list select destination directory or destination group publication,
From the popup menu select the option. Alternatively, the toolbar
 button or
main menu option can be used,
button or
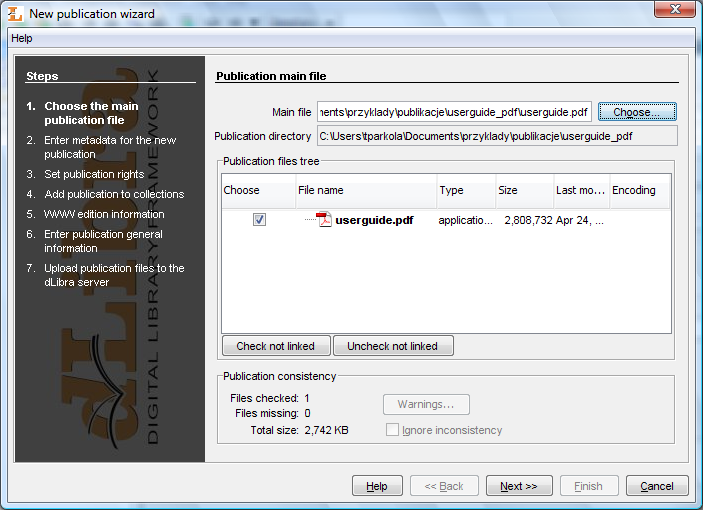
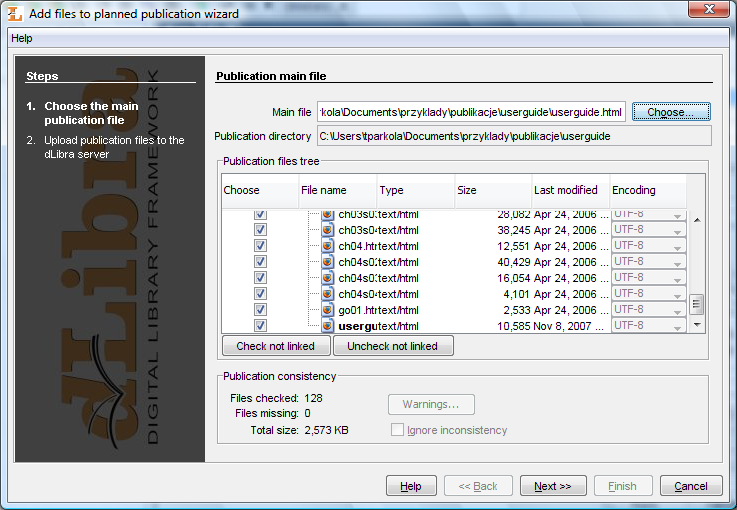
main menu option can be used,In the first step of the New Publication Wizard ( Figure 3.19, “New Publication Wizard - main publication file page” ) select the main publication file. If the publication content is in one file, for example PDF or MS Word document, choose this file. If the publication is composed of many files (e.g. HTML files) choose top level file (in case of HTML usually index.html).
If the main publication file is an HTML or DJVU file the wizard will try to find all publication files and verify consistency of the files. If there are any problems with files' consistency button will be activated so the user can press this button to see warnings. It is strongly recommended that only complete publications (without missing files) are put into the library. However, using the Ignore inconsistency option it is possible to proceed with an incomplete/inconsistent publication. All files that the publication consists of will be added to publication files table. There is no way to uncheck them, they all will be sent to the server.
Beside publication files, all the other files in main file's directory are listed on the files table. By default these files are not checked to send to the server. However it is possible to add additional files.
Notice that the main publication file and cannot be unchecked and it will always be sent to the server.
On the publication files tree it is also possible to modify file's type and encoding. Type modification should be performed only if the application incorrectly identified it (provide correct value in Type column). Encoding modifications are possible only for files which have such information (e.g. HTML). If the application incorrectly identifies encoding the edtiro may correct it by selecting appropriate encoding from the list in Encoding column.
Press the button to move to the the page.
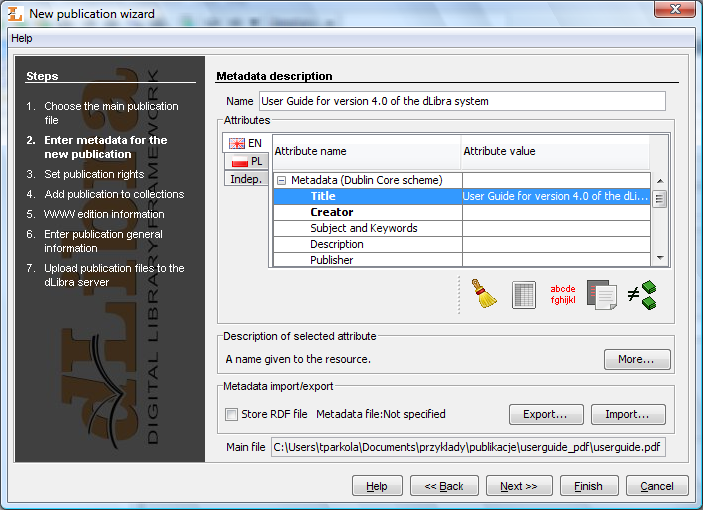
In the second step ( Figure 3.20, “New Publication Wizard - attribute values page”) the editor may provide metadata for the publication. See bibliographic description editor for details. In order to proceed to the next step publication name has to be given (Name field). By default the name is created basis on metadata by combining the title, author and publishing date (see configuration to change default settings). For example, if the title is “Stories”, author is “John Smith” and the publishing date is “2004” then the name will be “John Smith, 2004, Stories” - first author, then publishing date and title. Whenever user changes the metadata the name is updated. It is also possible to enter different name or modify default name. Press the button to move to the next step.
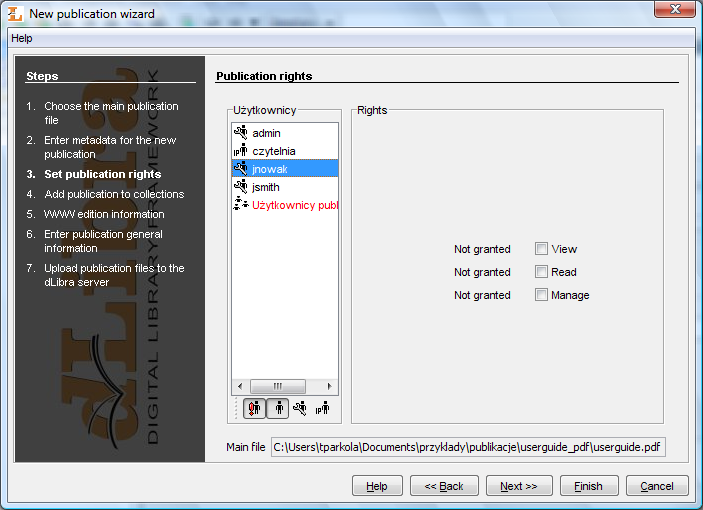
In the third step ( Figure 3.21, “New Publication Wizard - publication rights page” ) user may grant appropriate rights for other users to publication. For more details about rights management for publication see section Rights editor. Press the button to move to the next steps.
In the fourth step ( Figure 3.22, “New Publication Wizard - publication's collections page”) user may assign publication to collections. See Publication's collections editor for details. Press the button to move to the next step.
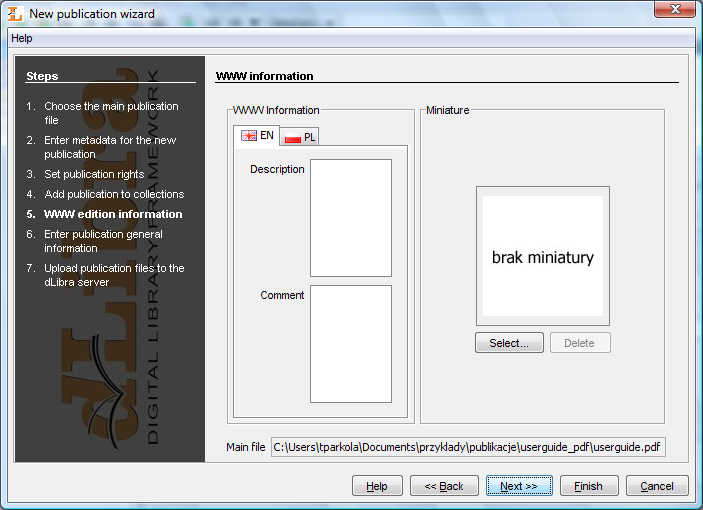
In the fifth step ( Figure 3.23, “New publication wizard - WWW information”) it is possible to specify WWW information concerning the first edition of the new publication. WWW information consists of:
Description - short edition description, e.g. what does it concern, visible on WWW search results page (it is recommended to provide the description possibly short --- one or two sentences),
Comment - characteristic information concerning the edition, e.g. specific marks (for example the lack of one page),
Miniature - graphic edition representation visible on the WWW edition information page.
Press the button to move to the next step.
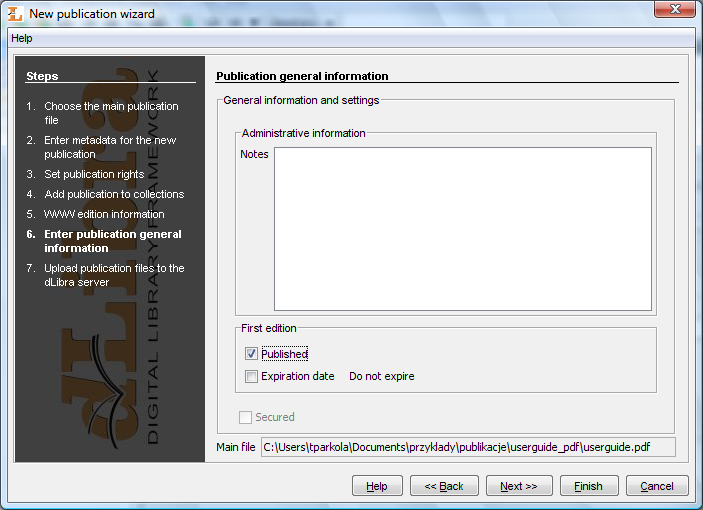
Step sixth ( Figure 3.24, “New publication wizard - general information”) allows user to provide general information:
Notes - administrative notes concerning publication
First edition - panel which allows for publishing the first edition (uncertain or time publishing)
Secured - if checked, publication will be secured - copying, printing will not be possible (applies only to HTML publications)
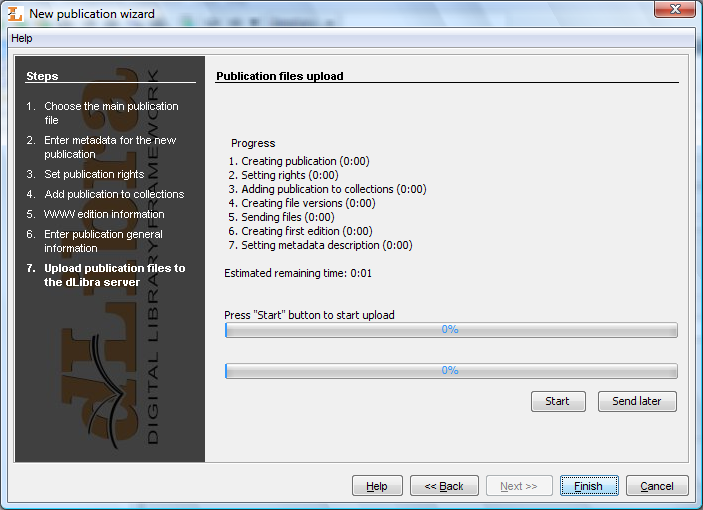
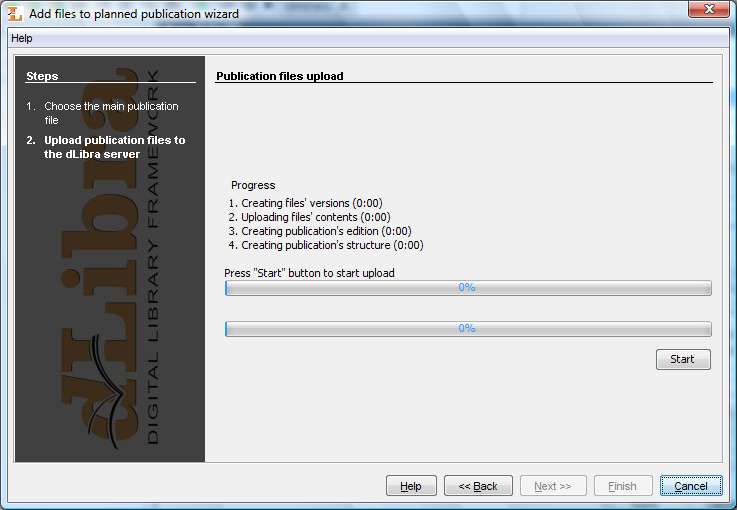
Uploading files on the server is the last step ( Figure 3.25, “New publication wizard - creating publication on the server”). Press the button to create publication on the server. The process can be paused and resumed by pressing the button again. During the creation process on the Progress panel all operations which have to be performed are presented. Operation which is being performed is marked with bold font. For every operation elapse time is measured and presented (in seconds) in the brackets after the operation name. Progress bars inform about progress of the operation. When all operations are finished a short summary is presented. During the creation process it is possible to cancel it (e.g. press the button). In addition, it is possible to postpone the whole creation process by pressing button. When the button is pressed all the information concerning publication are saved on the local drive and the wizard is immediatelly closed. All posponed publication are added to special list which can be managed on the send publication dialog which is described in the posponed publication upload mechanism section. Posponed publication upload mechanism allows editor to prepare a set of publications which are to be created and then start the upload of all the publications at once (e.g. start it at the end of the work). It should increase the number of submissions as the editor does not have to wait for each publication upload to complete because the upload of all prepared publications may proceed after editor's work.
In the last step of the new publication wizard the editor may choose button. This option stores on the local drive all the information concerning prepared publication and closes the wizard window. This publication is not created in the system (the creation process is posponed) therefore the editor does not have to wait for the time-consuming upload process (especially when it comes to files which have large size files). The publication is added to special list of posponed publications. The list of posponed publications can be managed on the send publications dialog ( Figure 3.26, “Send publications dialog”). In order to open this dialog select option from menu.
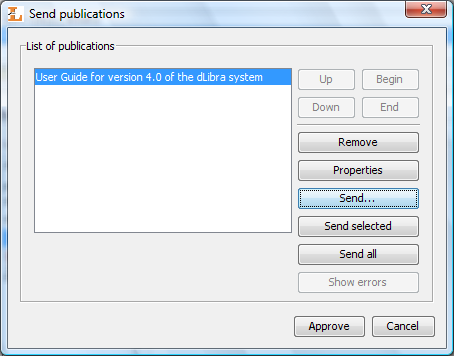
The list of posponed publications is located on the left side of the send publications window. On the left side there is a set of buttons which allows editor to manage the list. To change the position of the publication selected on the list use , , , buttons. button removes seleted publication from the list (all the information concerning the publication are irreversibly lost). button allows editor to modify properties of selected publication. button starts the upload process of all publications selected on the list and opens the dialog where upload progress is displayed. The progress dialog may be minimized (upload progress is then displayed on the status bar - bottom right corner of the application window) which allows editor to proceed interaction with editor's application simultaneously to the running background publications upload process. In order to open the progress dialog again select option from the menu. button starts the upload process of all the publications on the list. The progress dialog is opened. It can be minimized which allows editor to proceed interaction with editor's application simultaneously to the running background publications upload process. In order to open the progress dialog again select option from the menu. button allows editor to specify the date and time in the future when the upload process is to be started. When the button is pressed the send parameters dialog ( Figure 3.27, “Okno z parametrami wysyłania publikacji”) is opened where it is possible to provide additional send parameters.
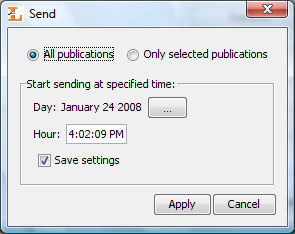
First the parameters specify whether all of the publications or only selected publications will be uploaded (respectively and option). Second it is the date and time when the upload process is to be started. Third it is the check box which saves usef preferences so that when the next time this function is used start time (hour) will be the same and the start day will be distant from the present the same number of days. These parameters for exampe allow editors to balance the server load (e.g. each editor has concrete hour assigned when he/she should start the upload process of all prepared publication). When the parameters are applied the progress dialog is opened and it is displaying the time remaining to start the upload process. When remaining time elapses the upload process is started. This dialog may be minimized by the user which causes the countdown and the upload process to run in background. In order to open the progress dialog again select option from the menu.
The last button () is useful only if errors occurred during the upload process. Publication which could not be send are marked with error icon. To show errors connected with a publication, select it on the publications list and press button. The editor may try to correct publication properties ( button)in order to repair errors.
To create a new planned publication
On the elements list select destination directory or group publication
From the popup menu select New planned publication.... It is also possible to select this option from toolbar or main menu.
Planned publication wizard consist of four steps. The first step is the same as the second step of new publication wizard. The second step is the same as the third step of new publication wizard. The third step is the same as the fourth step of new publication wizard. In the last, fourth step of new planned publication wizard ( Figure 3.28, “New planned publication wizard - general information” ) specify the administrative notes and information whether the publication should be secured or not (Secured check box).
To add files to planned publication:
On the elements list select a planned publication which you want to add files to.
From the popup menu select Add files....
Add content wizard consists of two stepts. The first step is the same as the firts step of new publication wizard. The second step ( Figure 3.29, “Add content wizard - sending content (files) on the server”) allows sending publication content on the server. In order to send selected files in the first step press button.
In order that reader could read publication's edition, it is required to assign to publication a “read” right for him and publish the edition. In order to publish the edition and assign a “read” right to the reader:
On the elements list select a publication which edition is to be visible for the reader.
On the edition's general information tab (Edition) select Published option.
On the rights assignment tab (Rights) select the user name (or group name - if we want to assign right to the group of users) which you want to grant the “read” right and then select the View check box.
In order to approve the changes press the button. The publication is now visible for users which have “read” right assigned.
To remove an element:
In the directories tree or on the elements list select an element to remove.
From the popup menu select
 Delete option and
confirm operation. Alternatively, a main menu or toolbar (only in
case of an element selected on elements list) can be used.
Delete option and
confirm operation. Alternatively, a main menu or toolbar (only in
case of an element selected on elements list) can be used.In case of publication and directory which contains at least one publication it is possible to specify remove reason for publications. The remove reason is presented to the WWW if a user attempts to read publication.
There are two ways of moving an object. The first way is possible when editor application has two elements list visible (see???). In order to move selected element from one list to the open element of the second list press F6 key. Remember that moving huge amounts of object (eg. directory) may cause high server load caused by information actualization. The second way is to use “Drag and drop” (this way you can move element between elements list and directories tree).
Content deleting is useful when we want to remove publication content (files), but leave editions' bibliographic description and delete reason.
To delete publication's content:
On the elements list select a publication which content is to be deleted,
From the popup menu select Delete content... option.
Enter delete reason. Attention! The reason is required because it is presented when WWW reader visits publication page.
Every user of the editor and administrator program may change his/her password. In order to change password press option from menu. Change password window will appear. To change password provide current password, new password and confirm new password.
User may find an element in two different ways.
Searching for an element basis on bibliographic description or administrative notes.
Searching for an element basis on its identifier.
Searching basis on bibliographic description or administrative notes gives two options. First it is searching in bibliografic description which gives the same results as searching on dLibra web pages. Second it is searching in administrative notes of elements. In order to open search window where both options are available select option from menu.
To run searching basis on identifier select option from menu. Then select type of an element to find (e.g. directory) and type identifier of the element to find. If such an element exists it will be displayed and selected on elements list. This kind of search is also available on the tool bar in editor's application where it is possblie to choose element's type and provide an identifier (in order to start searching press ENTER on the keyboard).